DeniedPixels ships with 18 different censoring styles. That’s a lot. And unless you just click through all of them one by one (which, honestly, is pretty fun), it’s hard to know what each one actually does from the name alone. So here’s the full breakdown — what it looks like, what you can tweak, and which ones work in reverse mode.
Static styles
These apply a fixed effect over detected areas. No movement, no animation — just a consistent censor that stays put. There are 11 of them.
Pixelate is the classic. The one you’ve seen a thousand times on TV. It breaks the detected area into chunky pixel blocks. You can control the pixel size — crank it up for barely-recognizable giant squares, dial it down for a subtler mosaic effect.
Blur does what you’d expect. Gaussian blur over the detected region. The intensity slider controls how aggressive it is — low values give you a frosted glass look, high values turn everything into an unrecognizable smudge.
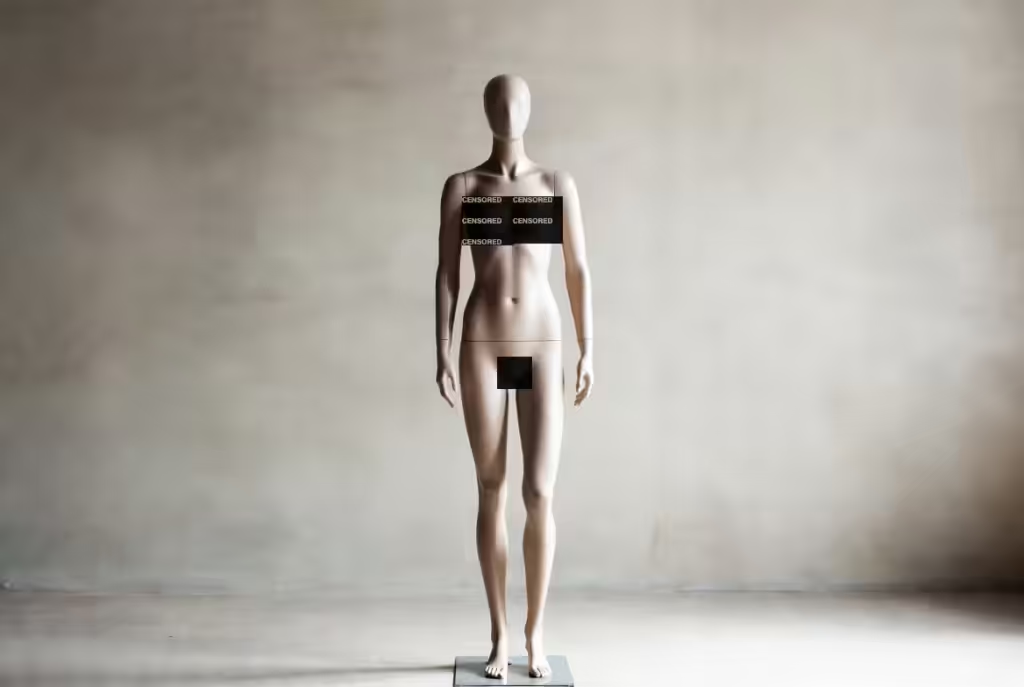
Black Bar is the no-nonsense option. Drops a solid black rectangle right over the detected content. There’s an opacity setting so you can control exactly how much coverage you want.
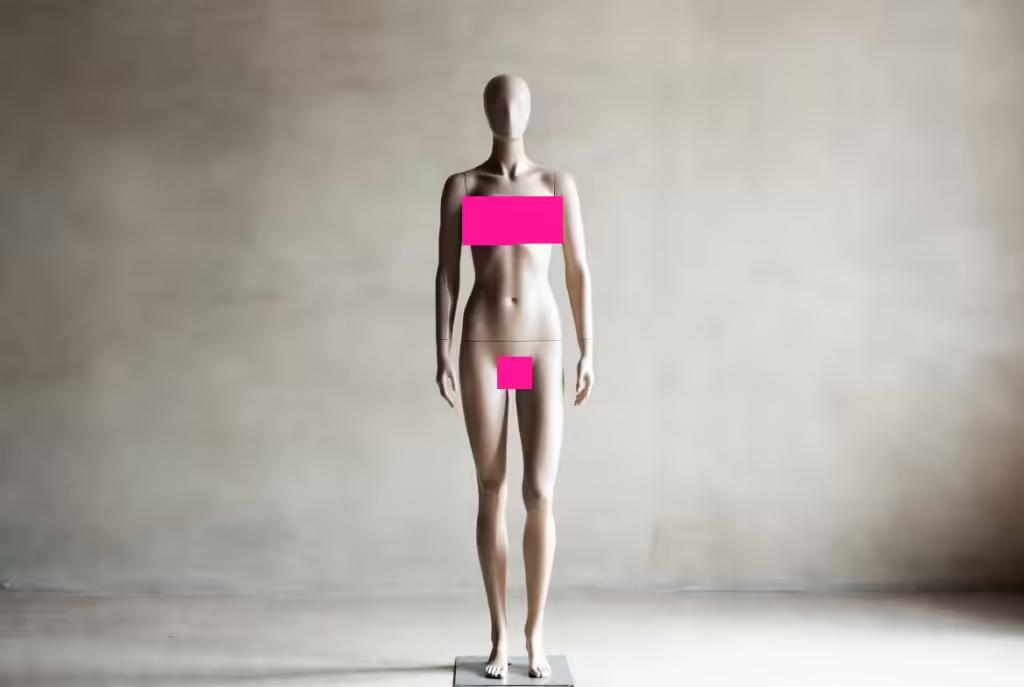
Color Fill is Black Bar’s creative cousin. Same idea — a solid rectangle over the detection — but you get a color picker instead of just black. Want hot pink censoring? Neon green? Go for it. The color is entirely up to you.
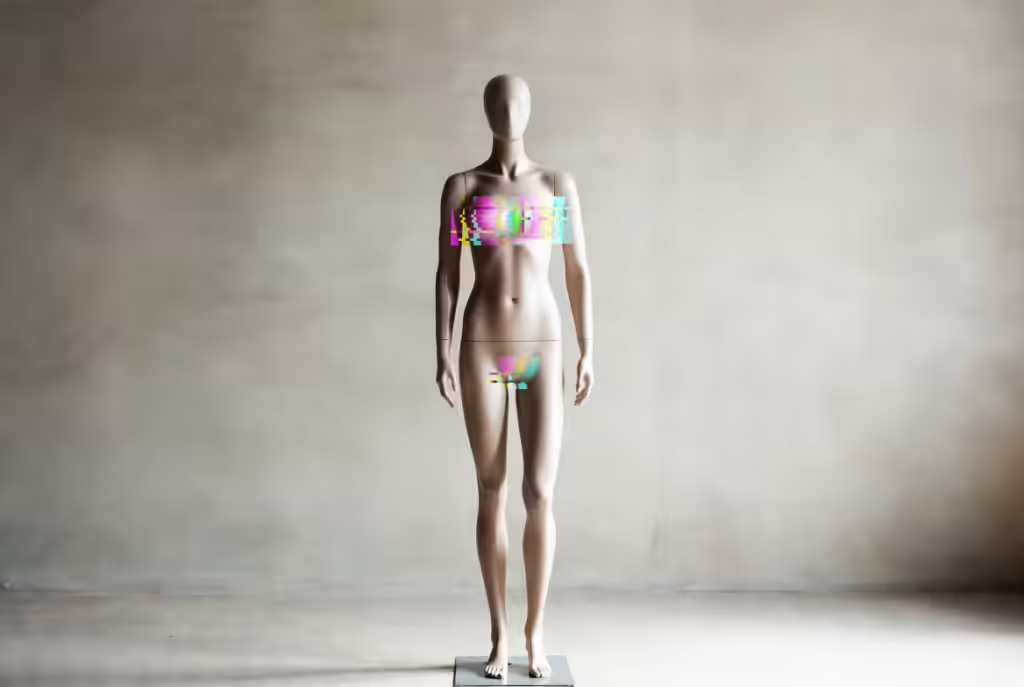
Glitch adds a distorted, corrupted-data look over the detected area. Think broken JPEG artifacts. The intensity slider controls how mangled it looks. It’s one of the more visually interesting static options — the censored areas look like they’re being scrambled by a bad signal.

Sticker places emoji stickers over detected content. You pick which emoji. It tiles them across the detection zone for full coverage. Simple, playful, and surprisingly effective at making censored content look intentional rather than clinical.

Redacted places a black bar with centered text over the detected area. The default text says “Redacted” but you can change it to whatever you want — “Denied,” “Classified,” “Nope,” whatever. It gives the whole thing a declassified-document vibe.
Word Wall is similar to Redacted but instead of one centered word, it fills the entire black bar with your chosen text repeated over and over. Set it to “censored” and the detection zone becomes a wall of text tiled across the whole area. Works really well at larger sizes.

Noise lays a grainy static overlay on top of the detected content. Like old analog TV snow but contained to just the detected areas. Intensity controls how thick the grain is — light noise is subtle, heavy noise covers everything completely.
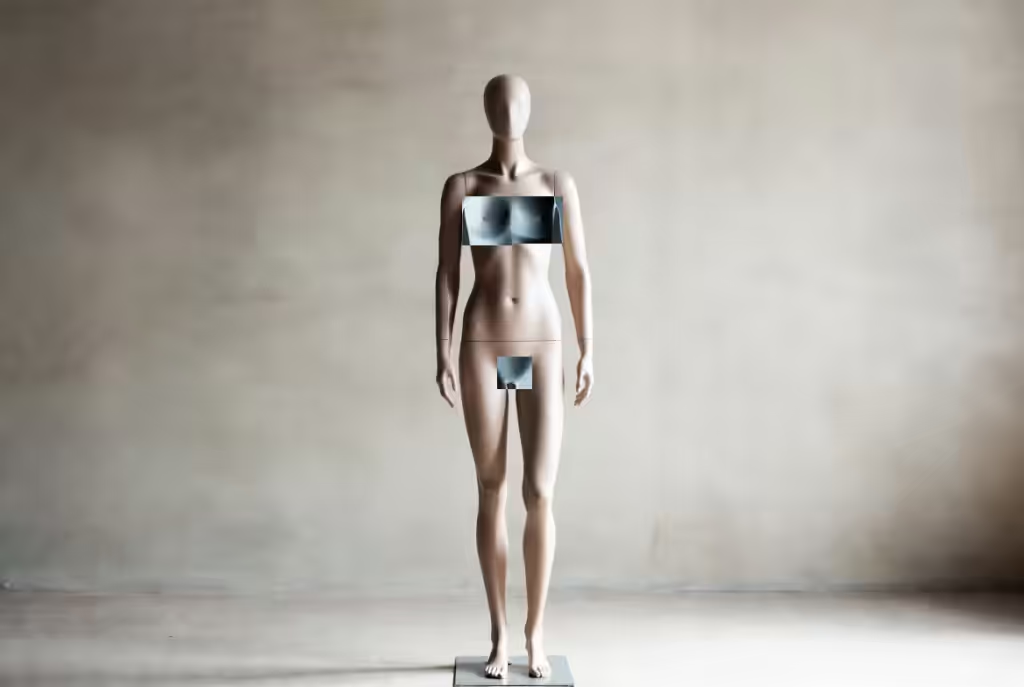
Color Invert flips the colors of the detected region. Everything looks like a photo negative. There’s no intensity setting here — it just inverts. The result is content that looks distorted enough that it’s hard to process visually.
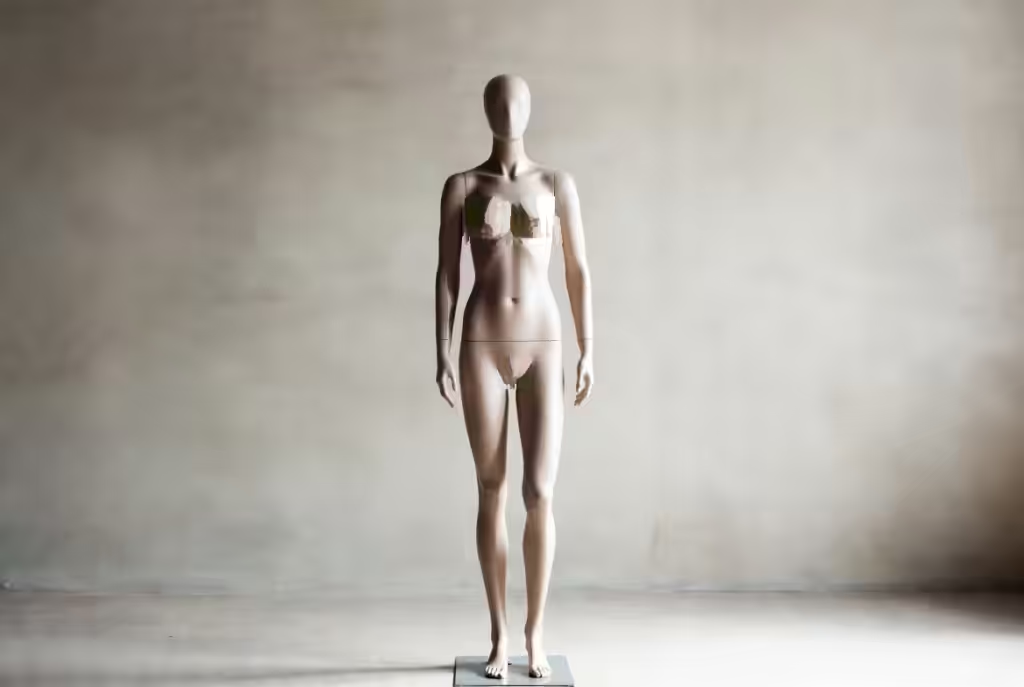
Oil Paint transforms the detected area into something that looks like a painted canvas. At higher intensity it smears the content so heavily that it becomes completely unrecognizable — just abstract blobs of color. At lower settings you get more of an impressionist painting effect. Either way, detail gets destroyed.
Animated styles
These add movement to the censoring effect. Instead of a fixed overlay, the censor itself changes over time. There are 7 of them.
Static Noise is the animated version of the Noise style. Instead of a fixed grain overlay, it cycles through random noise patterns — like an old TV tuned to a dead channel. The detected areas become buzzing rectangles of visual static.
Scan Line places black bars over detected areas and animates a colored beam that sweeps from top to bottom on repeat. You control the beam color, sweep speed, and strip width. The visual effect resembles a scanner passing over the image continuously.
Spotlight covers detected content with black boxes and adds a circle that drifts around the screen — think old DVD screensaver. You set the circle size and how fast it drifts. The circle interacts with the censored areas as it moves, creating a dynamic visual effect across the image.
Shrinking starts with full black bars over every detected area. The bars gradually reduce in size toward their center until they hit a minimum size you’ve configured, then snap back to full coverage and start over. The minimum size setting lets you control how much the bars contract before resetting.
Permission Denied places black bars with a red stamp text over detected areas. The stamp text is customizable. The bars include a timed flash effect with configurable duration and randomized intervals, adding an unpredictable visual element to the censoring.
Loading Bar is the most elaborate style. It covers detected content with black bars and adds a progress bar at the bottom of the image. The bar fills up over time based on your speed setting. There’s an error chance setting — a configurable percentage that the progress resets to zero at any point. One-time mode takes it further: if an error triggers, that specific image stays permanently censored across the entire web. You control loading speed, error chance percentage, and whether one-time mode is active.
Pixel Wall builds a wall of pixelation from the bottom of the image upward at a configurable speed. As the effect progresses, more and more of the image gets consumed by chunky pixel blocks until the entire image is covered. There’s a one-time mode option — when enabled, once the pixelation reaches the top, it stays permanently. The image remains fully pixelated across every future encounter on any website.
Reverse mode
Reverse mode flips which part of the image gets the effect applied. Instead of applying the censoring style to detected regions, it applies the style to everything outside those regions. It’s an alternative visual mode that changes the overall look of how the extension processes images.
Most styles support reverse mode: Pixelate, Blur, Black Bar, Color Fill, Glitch, Sticker, Redacted, Word Wall, Noise, Color Invert, Static Noise, Scan Line, Spotlight, Shrinking, and Permission Denied. Oil Paint and Loading Bar are the only two that don’t.
The effect varies a lot depending on the style. Reverse mode with heavy Blur, for example, produces a dramatically different visual result than reverse mode with Sticker or Word Wall. It’s worth experimenting with different combinations to find what works for you.
Which style should you use?
Just try them. The extension lets you switch styles instantly and preview the result, so there’s no commitment involved. That said, a few starting points:
If you want maximum coverage, go with Black Bar at full opacity or Pixelate with large pixel size. These are the most straightforward options.
If you want something that looks interesting rather than clinical, Glitch, Oil Paint, or the animated styles are worth exploring. They make the censoring feel designed rather than just a blunt block.
If you want dynamic effects that change over time, the animated styles each offer a different kind of visual behavior — from simple continuous effects like Static Noise to more complex options like Loading Bar with its progress and error mechanics.
And if you want to experiment with reverse mode, start with Blur. It’s the easiest way to see how the inverted logic changes the visual output before trying the more complex styles.